
Technology Tip of the Month
February, 1997: Sharing Bookmarks:
A Guide for the Teacher Who Doesn't Do HTML
by Deborah Healey
This month's Tech Tip shows how to create a list of Web sites for your
students using bookmark files. If you are used to programming in HTML,
the language of the Web, this will be old hat. If you have a Web
authoring program like PageMill or Claris Home Page, you may have your
own method of creating such files for your students. If you've already
got a lot of bookmarks and want to organize them for students, though,
you may find this Tip useful.
The examples I use will be taken from Netscape Navigator, but the same
techniques apply to other browsers.
Save the Original
Start up your web browser (Navigator, etc.). The first step is to save
the bookmarks you have now so that you can get your own back.
- Under the Window menu, choose Bookmarks.
- Under the File menu, choose Save Bookmark File.
- Call the file bookmarks.htm and save it someplace you remember.
Add Bookmarks
If you don't already have bookmarks to the sites you want your students
to use, navigate there and choose Add Bookmark from the Bookmark menu or
the equivalent on a browser other than Netscape. It doesn't matter what
order they're in right now--you'll be fixing that in the next step.

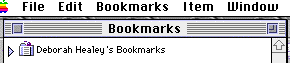
Formatting your Bookmark List
Pull down the Window menu to Bookmarks. You'll see a screen like this,
but with your own bookmarks. It will give you a new menubar to work
with, as well.
Now you have a decision to make. Do you want to give your students
hierarchical lists, where they can see different topics, each in its own
folder, or separate lists, each with one topic?
- Hierarchical Lists
- Choose Insert Folder from the Item menu and give it a meaningful
name. If you want students to see a description, type that information
into the Description box.
You can single-click on any item in your bookmark folder and move it
with the mouse up or down until your list is organized the way you like.
If you are using folders, move items into the appropriate folder. You
can choose Add Separator from the Item menu as well, to put visual
breaks between items. The separators move the same way as everything
else, up and down with the mouse.
Editing Bookmarks
Now comes the useful part--fixing the names and adding descriptions.
When you Add a bookmark, it goes onto your bookmark list with the title
the author gave it. Sometimes the title isn't particularly illuminating.
(You've still got your bookmarks open, right? If not, go to the Window
menu and choose Bookmarks again.) Single-click on each item in turn.
You'll now be able to edit the title and--very importantly--add a brief
description of the site.
- Teaching Tip: Instead of just a description of the site, you
can put the tasks you want your students to do there.
Saving the File for Students
The bookmarks are in the order you want them, with meaningful titles and
descriptions or tasks. It's time to give the file to your students.
Go back to the File menu and choose Save Bookmark File As... again. This
time, call it anything except bookmarks. For best results, keep
the name short with no spaces, and add .htm (Windows) or .html (Mac) at
the end. You can close the Bookmarks window.
Copy that file to a file server where students can access it or to a
disk to distribute to students. In both cases, lock the file (Mac) or
make it read-only (Windows) if you don't want students to be able to change it.
Opening the New File
Choose Open File from the File menu, then select the file you've
prepared. You will see a list of sites with descriptions or tasks
associated with each one, and links you can click on to follow. [If
you're using Windows and have trouble opening the file,
take off the .htm at the end. Windows may have added it automatically
and invisibly.]
See a sample file
Putting Your Bookmarks Back
To get your bookmarks back the way they looked before, open Bookmarks
from the Window menu again. Delete all the bookmarks you have there now
(you have them saved in the other file, right?) Pull down Import
Bookmark File from the File menu and select the
bookmarks.htm you saved. If you look at your bookmarks, you'll see them
all back again. You can add the ones in the file for students by
choosing Import Bookmark File again and selecting the file you saved for
the students.
It may sound like a lot of work, but it's actually pretty quick once
you've done it a few times. It has the related benefit of helping you go
through all those bookmarks and make sense of them--something we could
all stand to do from time to time!
If you have questions, comments, or for more information,
contact Deborah Healey, dhealey AT uoregon DOT edu
https://www.deborahhealey.com/techtips/feb1997.html
Last
updated 26 June, 2009